Add your own title and intro here (Change this under Settings -> General -> Tagline)

Category: Uncategorised

Lesson Plan – Assignment 2A

Learning about and Teaching Double Dutch 

Goal

  • Lesson 1. Learners will explore and understand the history, culture, context and process of Double Dutch.
  • Lesson 2. Students will think about objects and memory.
  • Lesson 3. Learners will be able to turn a rope, jump multiple times by themselves while turning a rope, practice turning with two turners and begin to practice using two ropes

Learning Objectives

By the end of the lesson(s), learners will:

  • Be familiar with the history and culture of Double Dutch jumping.
  • Reflect on Professor Kyra Gaunt’s idea of “memories in objects”.
  • Learn how to turn a rope and jump, with intention to build skills towards jumping Double Dutch.

Prior Knowledge & Learner Profile

  • This lesson would be suitable for students in Grade 4-8
  • The learners have read books, watched videos and reflected on these stories and resources, so will be familiar with the process in this lesson. Students have also been introduced to jumping rope in PHE this year and in prior years.
  • Learners will need to be able to navigate a website and open and download external links.

Delivery

  1. Explain the purpose and scope of the lesson – learning about culture, history and sport, here Double Dutch.
  2. Share about me as a Grade 3 kid. I was the reigning champion for the highest number of jumps at my elementary school.
  3. What do you know about or wonder about Double Dutch?
  4. Share the Learning about and Teaching Double Dutch website.
  5. Show the Double Dutch Video here.
  6. Share the story of Wilfrid Partridge by Mem Fox.

Activity 1

Professor Kyra Gaunt, PhD (interviewed here), talks about “memories in objects.” For her, holding the ends of the ropes triggers memories of jumping Double Dutch as a girl. She says such objects can be things like favorite toys or jewelry, but also books, songs, sounds, or anything that helps us remember significant moments in life.

Listen to the story Wilfrid Gordon McDonald Partridge by Mem Fox.

Think about a “memory object” in your life. What memories does it bring up? What does it mean to you? What feelings does it trigger? Share some ideas with someone and write and/or draw a memory of a “memory object” that brings up feelings here.

Assessment

Students will show engagement and understanding by contributing to a discussion, and recording ideas. (In the subsequent lessons, students will show their learning by following instructions and showing movement skills and agility in jumping rope.)

PHE Curricular Connections and First Peoples Principles of Learning

  • persisting in tasks and goals
  • movement skills and strategies help us learn how to participate in different types of physical activities and environments 
  • learning involves patience and time

LA and Social Studies Curricular Connections

  • TBD

Resources

https://www.kennedy-center.org/education/resources-for-educators/classroom-resources/media-and-interactives/media/hip-hop/double-dutch-jump-in/

https://www.vice.com/en/article/nn974m/double-dutchs-forgotten-hip-hop-origins-456

https://www.nytimes.com/2021/12/08/learning/lesson-plans/lesson-of-the-day-training-for-double-dutch-at-the-apollo.html

https://www.britannica.com/topic/double-Dutch-game
Learning about and Teaching Double Dutch 

Goal

  • Lesson 1. Learners will explore and understand the history, culture, context and process of Double Dutch.
  • Lesson 2. Students will think about objects and memory.
  • Lesson 3. Learners will be able to turn a rope, jump multiple times by themselves while turning a rope, practice turning with two turners and and begin to practice using two ropes

Learning Objectives

By the end of the lesson(s), learners will:

  • Be familiar with the history and culture of Double Dutch jumping.
  • Reflect on Professor Kyra Gaunt’s idea of “memories in objects”.
  • Learn how to turn a rope and jump, with intention to build skills towards jumping Double Dutch.

PHE Curricular Connections and First Peoples Principles of Learning

  • persisting in tasks and goals
  • movement skills and strategies help us learn how to participate in different types of physical activities and environments 
  • learning involves patience and time

Prior Knowledge & Learner Profile

  • This lesson would be suitable for students in Grade 4-8
  • The learners have read books, watched videos and reflected on these stories and resources, so will be familiar with the process in this lesson. Students have also been introduced to jumping rope in PHE this year and in prior years.
  • Learners will need to be able to navigate a website and open and download external links.

Delivery

  1. Explain the purpose and scope of the lesson – learning about culture, history and sport, here Double Dutch.
  2. Share about me as a Grade 3 kid. I was the reigning champion for the highest number of jumps at my elementary school.
  3. What do you know about or wonder about Double Dutch?
  4. Show the Double Dutch Video here.
  5. Share the story of Wilfrid Partridge by Mem Fox.

Activity 1

Professor Kyra Gaunt, PhD (interviewed here), talks about “memories in objects.” For her, holding the ends of the ropes triggers memories of jumping Double Dutch as a girl. She says such objects can be things like favorite toys or jewelry, but also books, songs, sounds, or anything that helps us remember significant moments in life.

Think about a “memory object” in your life. What memories does it bring up? What does it mean to you? What feelings does it trigger? Share some ideas with someone and write and/or draw a memory of a “memory object” that brings up feelings here.

Assessment

Students will show engagement and understanding by contributing to a discussion, and recording ideas. (In the subsequent lessons, students will show their learning by following instructions and showing movement skills and agility in jumping rope.)

Resources

https://www.kennedy-center.org/education/resources-for-educators/classroom-resources/media-and-interactives/media/hip-hop/double-dutch-jump-in/

https://www.vice.com/en/article/nn974m/double-dutchs-forgotten-hip-hop-origins-456

https://www.nytimes.com/2021/12/08/learning/lesson-plans/lesson-of-the-day-training-for-double-dutch-at-the-apollo.html

https://www.britannica.com/topic/double-Dutch-game
Learning about and Teaching Double Dutch Website

What is Double Dutch?

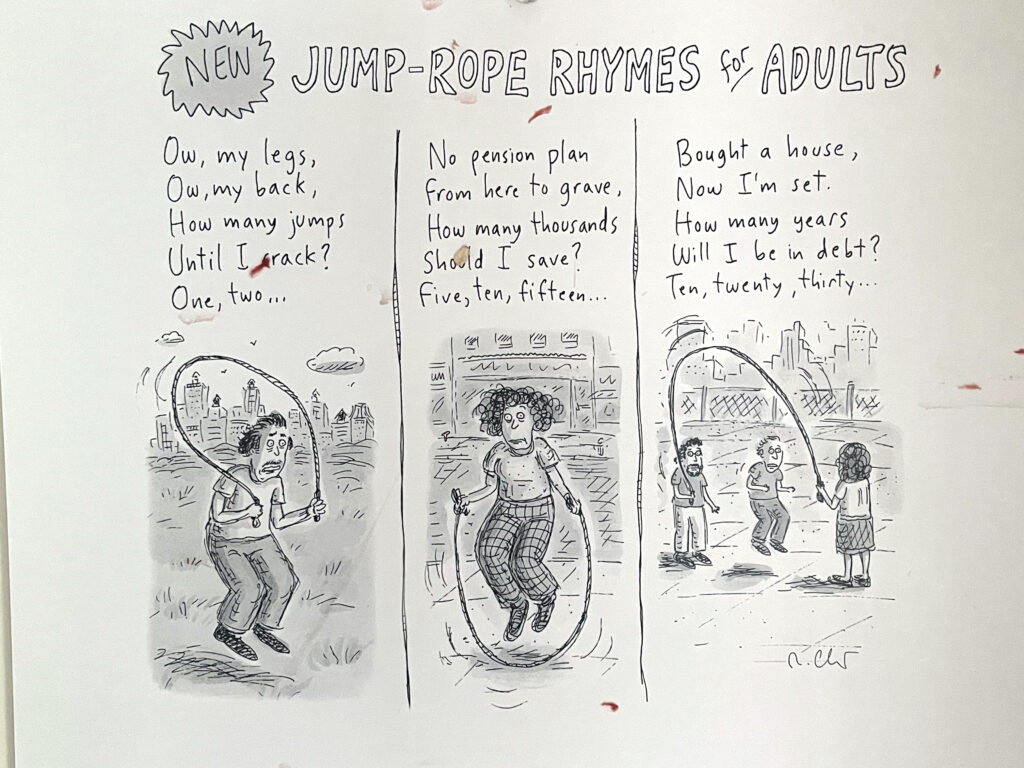
According to Britanica, Double Dutch, is a “game in which the player must time jumps between two jump ropes twirling in opposite directions…At least three children are needed to play double Dutch. Two children hold the ends of two ropes and turn them simultaneously in opposite directions while one or two jumpers, situated between the two ropes, jump over them as they turn. The activity is often accompanied by a chant or rhyme that gives the game additional structure.

Britannica, T. Editors of Encyclopaedia (2023, December 3). double Dutch. Encyclopedia Britannica. https://www.britannica.com/topic/double-Dutch-game

Not Just a Street Game

Double Dutch became a very popular cultural past time as well as a rigorous competitive sport.

Not Just Rope and Jumping

Professor Kyra Gaunt, PhD (interviewed here), talks about “memories in objects.” For her, holding the ends of the ropes triggers memories of jumping Double Dutch as a girl. She says such objects can be things like favorite toys or jewelry, but also books, songs, sounds, or anything that helps us remember significant moments in life.

Listen to the story Wilfrid Gordon McDonald Partridge by Mem Fox.

Think about a “memory object” in your life. What memories does it bring up? What does it mean to you? What feelings does it trigger? Share some ideas with someone and write and/or draw a memory of a “memory object” that brings up feelings here.

How To Double Dutch?

If you have had experience jumping and turning a single rope, you are ready to learn Double Dutch!

  1. You will need to find at least a group of three friends.
  2. You will need 2 ropes of the same length that are between 12 and 14 feet long.
  3. To turn the rope, you will have your elbows at your side and make circles from the elbow (left hand rotates clockwise, and right hand counter clockwise). The rotation should go from about your thigh to your chin.
  4. Keep an even rhythm/beat with the ropes.
  5. The jumper enters the ropes diagonally from close to a turner towards the middle of the ropes.
  6. The jumper will jump in when the rope closest to where they are jumping in hits the ground. The turners can say ready, set, go to set the jumper up for entry.
  7. Once the jumper is in, they will be aware of the r of the turners, but the turners also should be aware of the jumper’s speed.

Watch this video to see the steps in action!

Test Your Knoweldge!

5 – 3D Design and Educational Applications

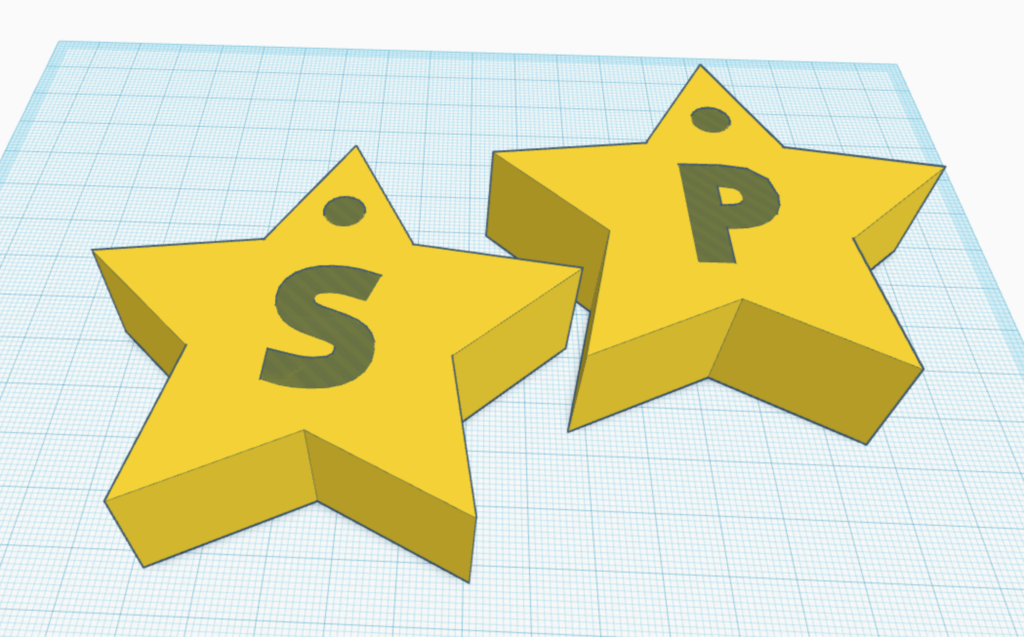
TinkerCad design

I had a really good time exploring TinkerCad. I didn’t produce anything outstanding, but I focused on learning how everything works so that I can apply this fundamental understanding of how the program works to more complex design projects.

I have mixed feelings about using 3D printing in ADST and other elementary subjects. It was interesting to brainstorm in groups and then share a class discussion regarding pros and cons of 3D design and printing: we that we had similar and differing ideas when thinking about 3D printing. For example, our group talked about the consumptive/consumer culture aspect of 3D printing. On the other hand, the other group thought about how 3D printing can help promote fixing rather than buying new. Rich called it “local manufacturing”. I asked about the type of material that can be used for 3D printing, and there is a flexible plastic that would work to make a part for an oven we have that has discontinued parts. Interestingly though, the work that would go into measuring to create a model of this part would be extremely laborious, so at this point probably not worth the time, unfortunately. Rich told us about the 3D scanners that can be used for such purposes, but at this point they require a high level of time and skill.

3D printing is being used for incredibly useful innovation in many fields. It has created incredible headway in many fields including medical science (3D printing using human cells), custom parts for scientific instruments (*my dad has had to find creative ways to make custom parts for deep sea instruments all his life without using 3D printing).

Interestingly, my son, Pascal, had a visitor from UVic who talked about science innovation. He showed the Pascal TinkerCad, so after I had played around with it at UVic, Pascal worked with it at home. He enjoyed it, and we will add it to our “useful” computer applications that the kids can spend “screen time” on.

Using TinkerCad in a class would definitely require a step by step lesson to begin. I would probably use this program in middle school with an intentional application that is part of an interdisciplinary project.

TinkerCad is a really great introductory application for anyone who is going to be interested in CAD programs or any 3D design work. There are definitely limitations and certain quirks associated with the program, but overall it is a great entry-level program with many benefits.

*Here is a photo of an instruments that is being replaced in an old CORK spot on the eastern flank of the Juan de Fuca Ridge access. Watch the

https://nautiluslive.org/live/channel-3

*Go to -06:06 and think about how the operators of the ROV work together. How do you think they train for this? How long do you think training takes? What tools and training might you have that would help you work the ROV?

4 – AI…meh

Dipping into and dabbling with AI

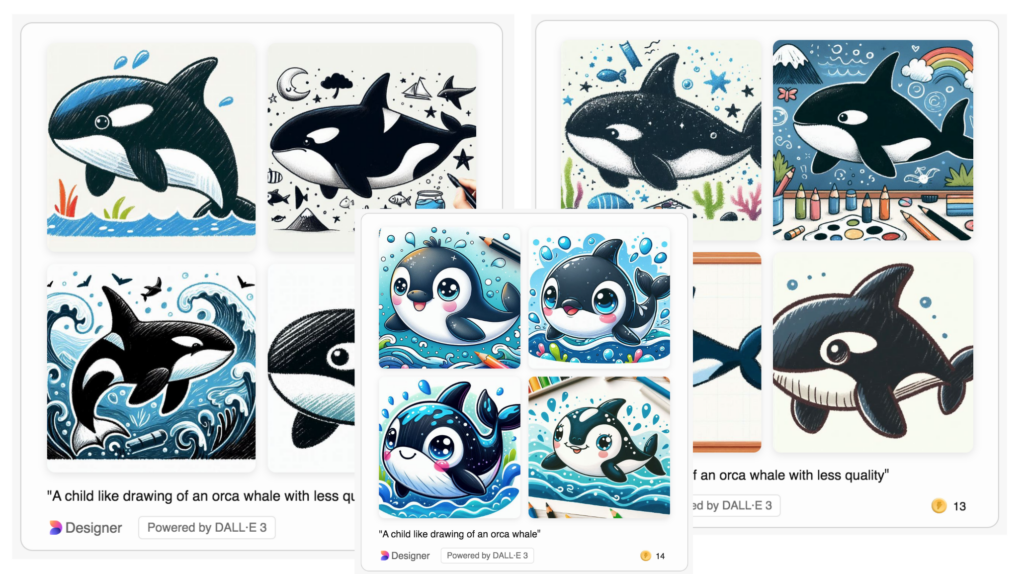
I didn’t set out with a need or reason to find an image of a killer whale, however, when Rich suggested using a killer whale as a test search, I thought, lets see if AI can emulate a child’s drawing of a whale. These are some of the attempts.

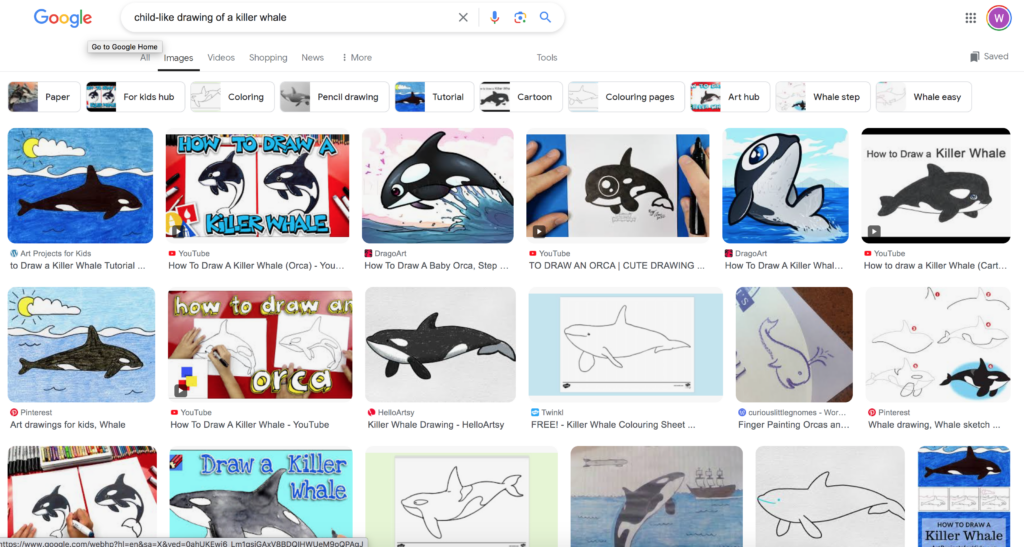
Interestingly, a similar search in Google produced better results.

Finally, I asked AI to draw a line drawing of a killer whale. Here is what I got (And I don’t have time or need to try following the instructions because I have no time, and because I know how to draw an orca…but, it would be interesting to test the results to see if the steps are easy enough to follow and result in a decent killer whale drawing.)

Certainly! Let’s create a simple line drawing of an orca (killer whale). 🐋

  1. Begin by drawing a long, curved line. Note that one side of the line dips down farther than the other. This outlines the shape of the orca’s back, tail, and head.
  2. Next, draw another long, curved line continuing from the end of the first. Loop the line around, following the basic outline of the first line. Narrow the space between the two lines, but do not connect them. This outlines the whale’s face, belly, and tail. Then, draw a shorter line near the tip of the whale’s head, forming the mouth.
  3. Use a series of curved lines to sketch the tail fin. Enclose the bottom of the fin using a curved line like the punctuation mark braces or curly brackets – {.
  4. Draw a long, curved line from the base of the tail to the tip of the mouth.
  5. Sketch the shape of the pectoral, or side, fin using a long curved line. Notice how the fin is shaped like an irregular triangle with rounded corners.
  6. Erase guide lines from the fin.
  7. Use a long curved line to enclose the dorsal, or back, fin. Notice how this fin, too, is roughly shaped like an irregular triangle.
  8. Draw the pectoral fin on the orca’s far side. Use two curved lines that meet at a point, enclosing an irregular triangle shape.
  9. Detail the snout with a curved line. Draw a small dot to indicate the eye. Sketch in the eyespot – a false eye – using two curved lines to enclose a double teardrop shape.
  10. Color your orca. Killer whales are black and white in color. The upper portions are dark, providing camouflage from above, while the underbelly is white, blending in with sunlight when viewed from below. The white eyespot tricks both predators and prey, protecting the actual eye from attack and giving the whale an intimidating appearance.

Feel free to give it a try, and don’t worry if it’s not perfect! 🎨🌊

I also tried to see if the AI would draw a characture of Eminem/Marshall Mathers. It pointed me to follow-along YouTube videos.

What do I think?

I spent a while trying to get just what I wanted from my Copilot searches. Nothing I was hoping to find came close to what I found via Google, or better, what I could have done myself. Better. Because I use my brain and have practiced doing, finding and honing to get exactly what I envision in my own *non-status quo brain*.

It feels like the AI generated images that my searches turned up were very status quo, and generic. I felt like they were exactly what I avoid when searching for images–clip art-esque.

It was an interesting discussion in class regarding learning about and using AI. I haven’t had a justifiable need to use AI yet: My desire and need for AI has not outweighed the time I spent fussing and creating accounts and navigating, and today’s experience hasn’t sold me…

As I spoke about in class, I am curious about the correlation/relationship/comparison between technological advancements/enhancements for physical and mental human tasks and propagation of knowledge. I am interested in how these advancements have helped human “progress” and if/when these technologies have been/will be a detriment to human “progress”.

I put progress in quotations because the idea of progress feels colonial, and seems to favor privilege and power. This is a whole other aspect to consider.

I continue to return to the Indigenous ways of knowing and being. AI and such advanced technologies obfuscate important human function and behavior such as interaction, connection with others and the natural world, physical activity, creativity, curiosity and problem solving, etc., which are all fundamental aspects of what it is to be human.

I understand and appreciate learning about and how to use AI so that as an educator, I know what this tool is and how it can be used. It definitely has benefits, and can be very helpful/powerful when used intentionally for specific purposes.

I also think that systems must change and teaching has to adapt. This is what I was speaking about in the first post about the importance of considering all contexts and factors in teaching–relationality. Medicine wheel teachings highlight the balance of the four aspects of our being: spiritual, emotional, physical, mental.

Source: James Dumont (1993); “Justice and Aboriginal People”

Interestingly, when I searched “medicine wheel” and “medicine wheel indigenous / first nations”, there were no images even close to this one. This one comes from the pen library textbook called Historical and Contemporary Realities: Movement Towards Reconciliation found here.

Cover

3 – Video and Story

Overview of Skafest website using video and H5P

Reflection on using video in teaching and learning

Reflect on why teaching with stories can catch the attention of learners and make it easier for them to recall information embedded in stories.

If a quote is worth a thousand words, Thomas King could answer this question perfectly when he says that “the truth about stories is that’s all we are”.

In Indigenous culture, the First Peoples Principles of Learning and Indigenous ways of teaching, learning knowing and being in general, story is considered one of the most important ways of learning, communicating and understanding the world. Story is imbedded into every part of Indigenous life and culture. It is inextricably connected to language, and inextricably place and people.

What are the pros and cons of using video creation as a teaching tool for language revitalization in one of your practicum classrooms?

Video (and audio) is an excellent tool for language revitalization. It provides ways to hear the sound of language and words, see the way mouths must moves, and video can include visuals and gestures that enhance the auditory learning. Gesture and sign approaches to language learning have shown to be very successful. During my mom’s career as a French teacher, the AIM program was introduced. It used a number of ways of learning to accelerate language aquisition. Similar to this, the SENĆOŦEN immersion teachers at the school where I work have been learning and teaching using gestures.

Re-Educate

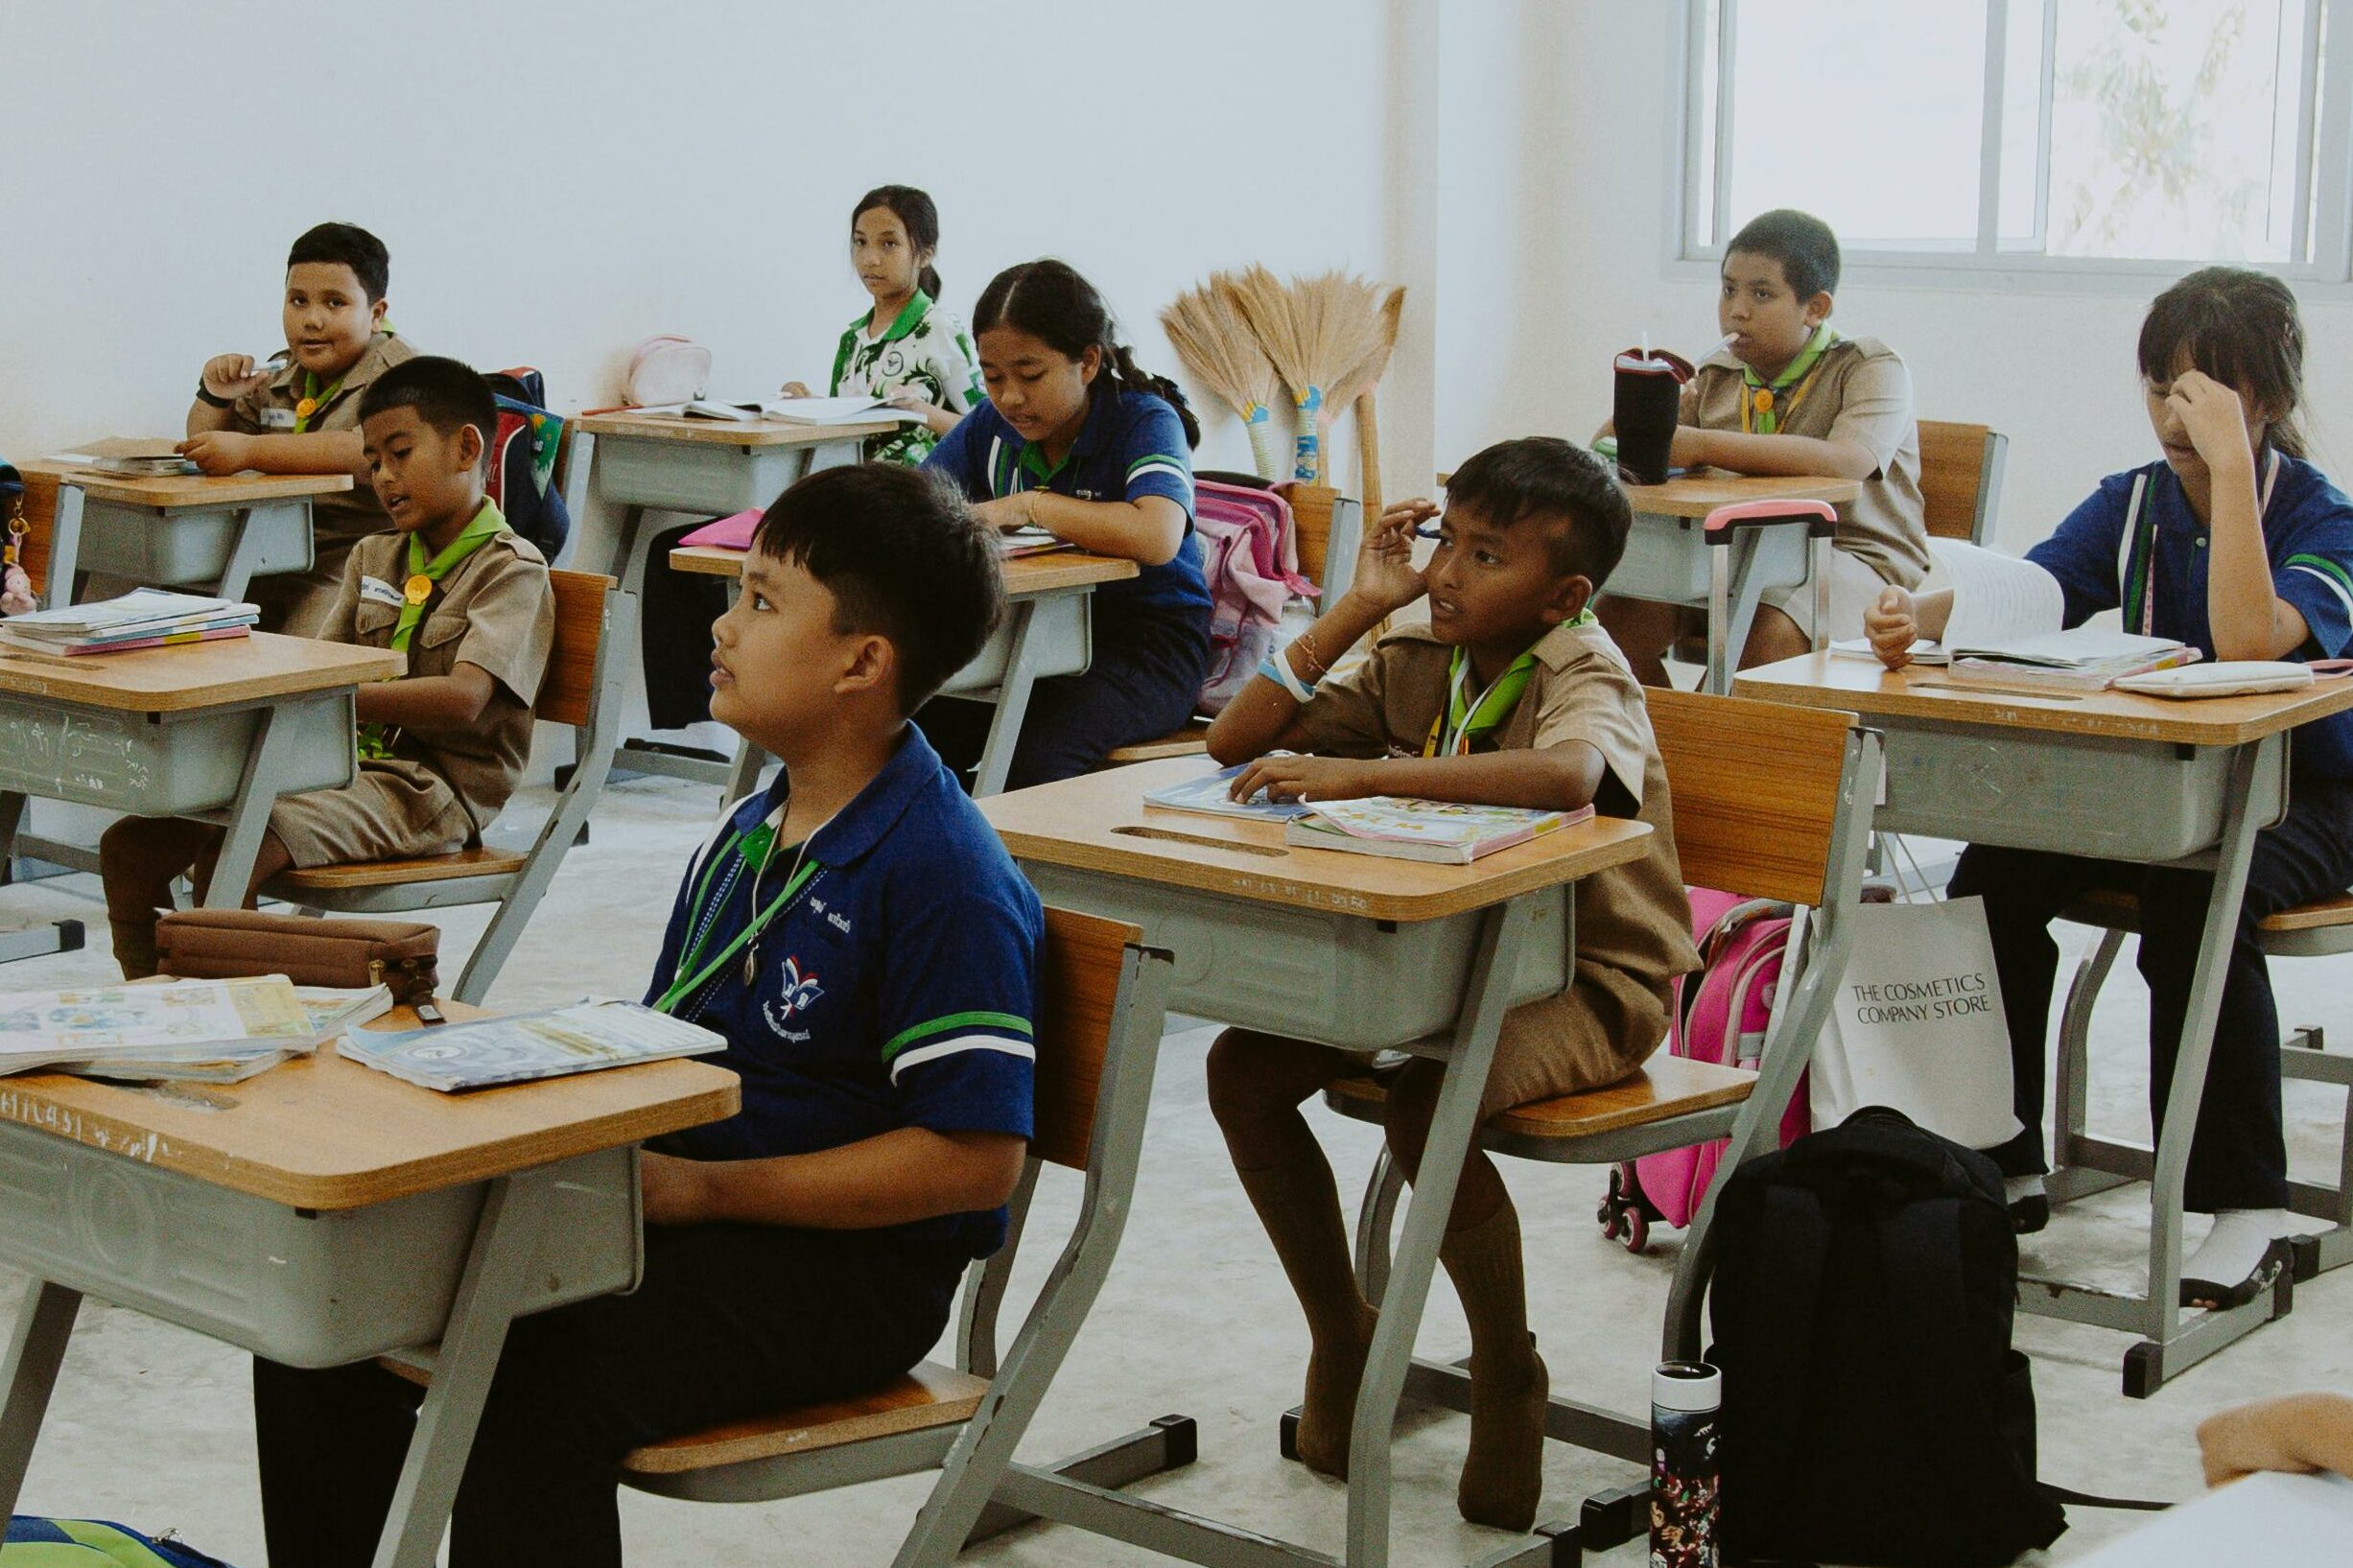
Photo by Ron Lach : https://www.pexels.com/photo/children-sitting-in-the-classroom-10646410/

Listen to more music by Paint the Town Red.

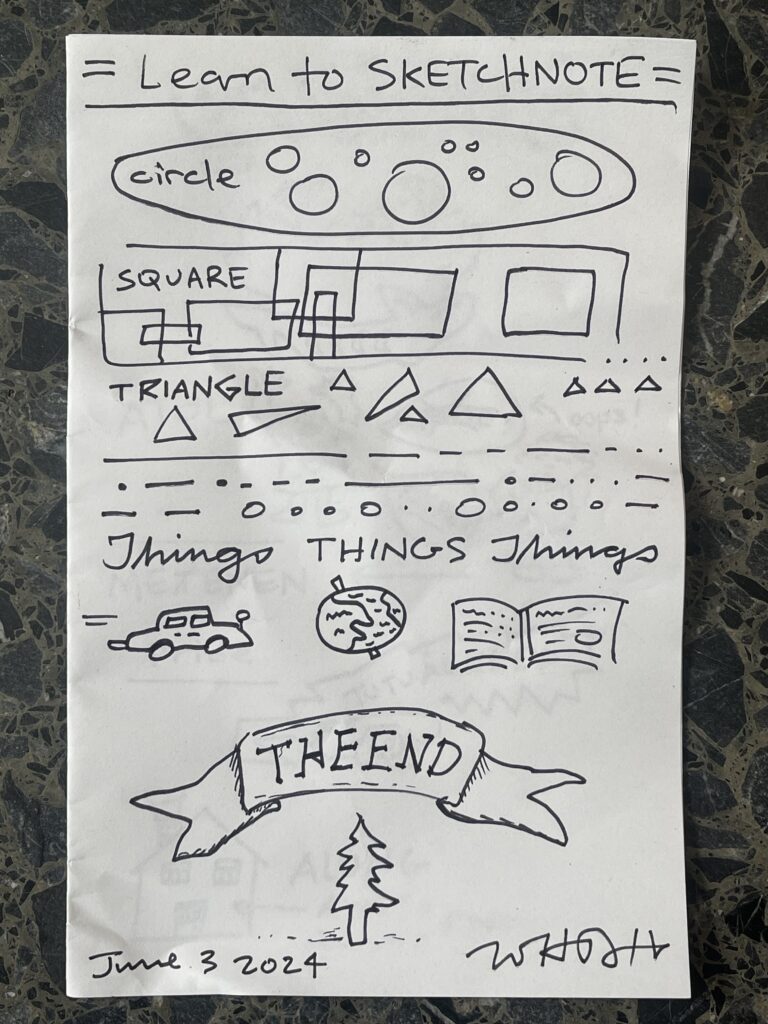
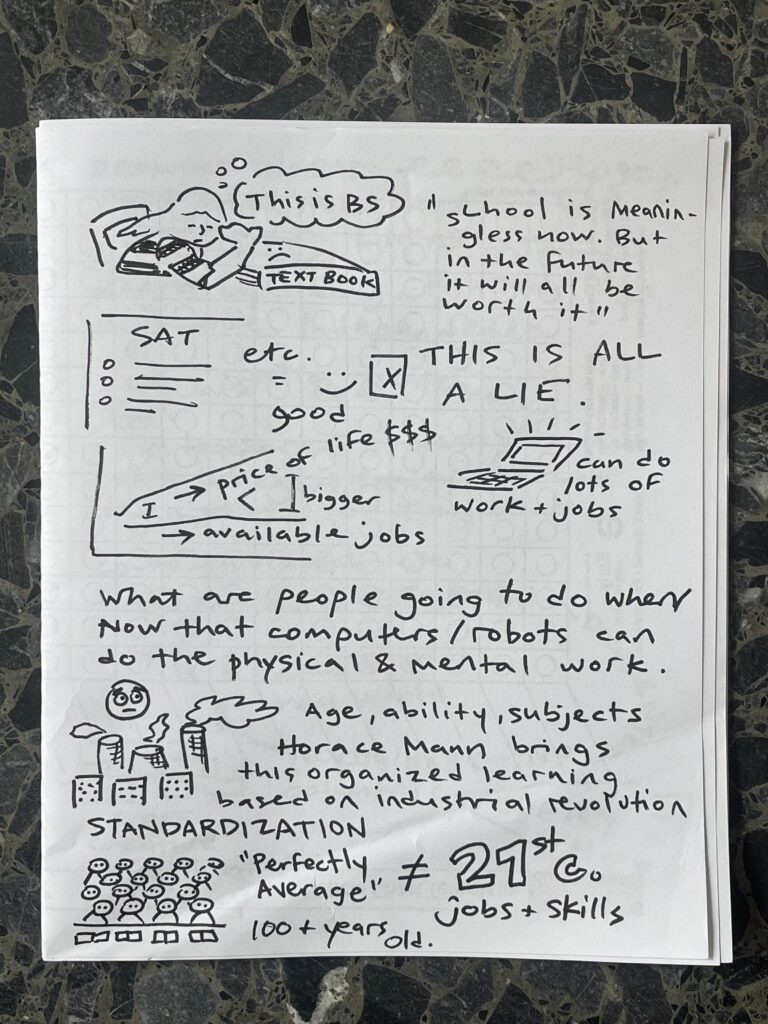
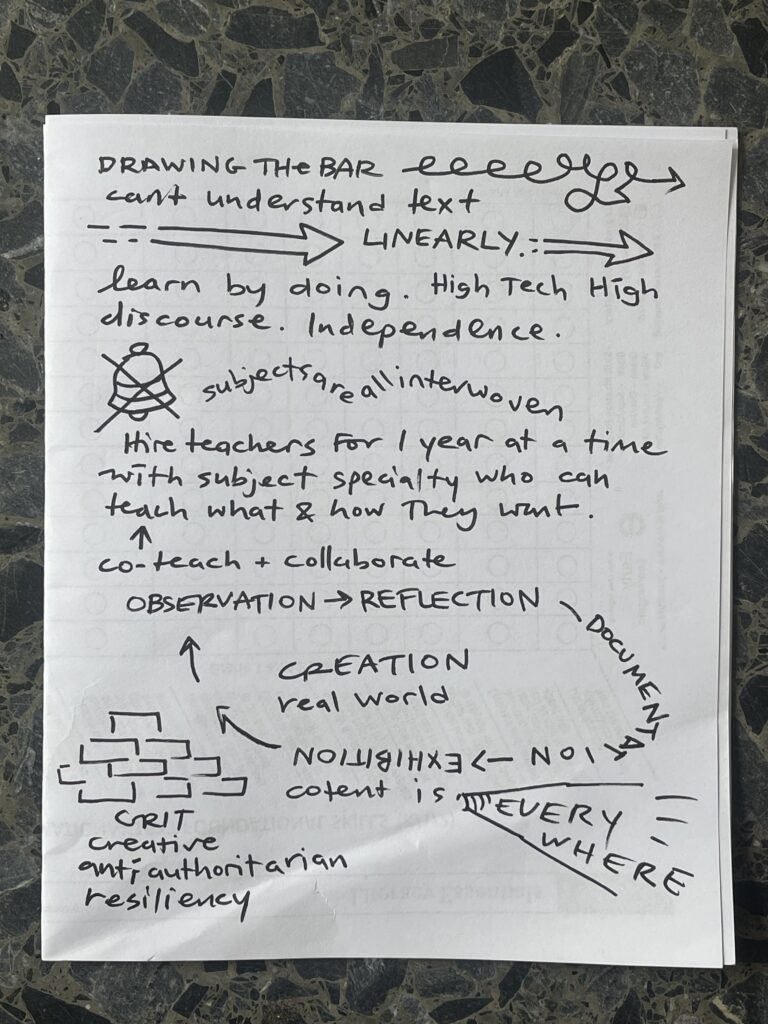
Sketchnote Trial

Video Sketchnotes

Reflection Questions

  1. Do we need to re-imagine education?

Re-imagining education is necessary not only when change is well past due, but on a daily basis. Everything that an educator does in a day, week and year should be informed by ongoing interaction, learning, “assessment” and “feedback”. Educators must adjust content, practice, methods and ways of thinking and doing according to a huge range of factors that change daily, as well as over time. I believe that the more interaction and stronger the community in a classroom, school and beyond, the more dynamic, fluid, ongoing and consistent re-imagining education is.

2. What obstacles do educators often face when they try to change they way they teach?

Educators face challenges all the time when re-imagining education. Some factors include: access to funds, access to education/professional development, school and community support/perspectives, school and government mandates/restrictions, working conditions, etc.

3. What concerns and/or excites you about this approach?

The approach of always being open to learning and change and trying new things keeps me interested and invested in learning and teaching. When I am excited to learn and try new ways, it keeps me excited and shows students that it is fun to learn. In this way, I am learning alongside my students.

This all relates and can contribute to decolonization in education and in systems in general.

© 2025 techined

Theme by Anders NorenUp ↑